
How to Dry and Cure Cannabis Without Losing Flavor (or Growing Mold)
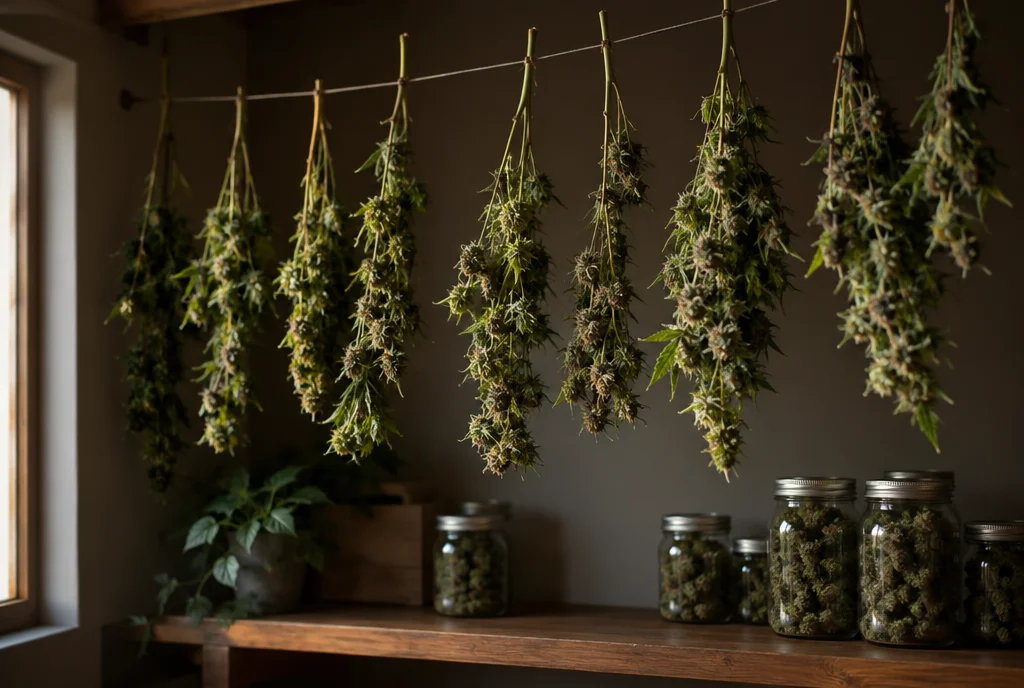
You can grow a perfect plant and still ruin the harvest in the last two weeks. Dry your buds too fast and they taste like hay. Dry them too slowly and they can grow mold. Drying and curing are where homegrown flower either becomes something special or gets thrown away, and most first-time growers rush it.
Here’s what actually happens to a bud after you cut it, why the conditions matter so much, and a simple routine that works at home.
What Drying and Curing Actually Are
Freshly cut flowers are mostly water. Before they can be stored or smoked, most of that water has to leave. Drying is that first stage: the slow removal of moisture until the buds are dry on the outside and the small stems snap instead of bending. Curing comes next: storing the dried buds in sealed containers for a few weeks so the moisture left deep inside the bud evens out, the harshness fades and the aroma settles.
Two things are at stake the whole time:
- Terpenes, the aromatic compounds that give each strain its smell and flavor. Many of them evaporate easily, and warmth speeds that up.
- Mold. A dense bud full of water, sitting in warm, still air, is an ideal home for fungi.
Good drying is a balancing act between those two. Too much heat and airflow drives off the terpenes. Too little and the buds stay wet long enough for mold to take hold.
Why Slow and Cool Wins
There’s solid evidence that rushing costs you flavor. In a classic University of Mississippi study, buds dried and stored in paper bags at room temperature had lost roughly 30% of their volatile oil, the fraction that carries the scent, after one week, and more than half after three months. Drying will always cost some aroma. The goal is to lose as little as possible.
Heat has other side effects too. In a 2025 hemp study, hot-air drying at 75°C (167°F) finished in eight hours, but it converted about 9% of the plant’s acidic cannabinoids, compared with less than 0.1% for drying at room temperature over a week. That’s why ovens, microwaves and food dehydrators are a bad idea for flower you plan to smoke.
The opposite mistake is just as costly. In a study of medicinal cannabis dried the traditional way, in open air at 15°C and 50 to 55% humidity for two weeks, about 80% of the buds from one variety ended up heavily infested with Alternaria mold. Slow is good. Damp and stagnant is not.
So what conditions do the experts recommend? Oregon State University Extension suggests slow drying in a dark, well-ventilated room at 18 to 21°C (64 to 70°F) and 50 to 55% relative humidity. Many home growers use the easy-to-remember “60/60” rule instead: around 60°F and 60% humidity. Both point to the same idea: cool, dark, moderately humid, with gentle air movement.
How to Dry Cannabis at Home, Step by Step
- Harvest at the right time. Drying can’t fix buds that were cut too early. If you’re not sure when to harvest, read When to Harvest: How to Read Trichomes.
- Trim the big leaves. Remove the large fan leaves. Whether you trim the smaller “sugar leaves” now (wet trim) or after drying (dry trim) is up to you. Leaving more leaf on slows drying slightly, which can help in a dry home.
- Hang whole branches. Cut the plant into branches and hang them upside down from a line or hanger, with space between them so air can move. Branches dry more evenly than loose buds on a tray.
- Keep it dark. Light breaks down cannabinoids. A study from 1976 found light exposure was the single biggest factor in cannabinoid loss during storage, and the same logic applies while you dry.
- Move the air, not the buds. A small fan pointed at a wall, not at the branches, keeps air circulating without blasting the flowers dry on the outside.
- Check daily. Squeeze a bud gently and bend a small stem. Most home dries take somewhere between about one and two weeks, depending on bud size and the room. When the thin stems snap instead of folding, you’re ready to cure.
Warning signs: an ammonia or “hay” smell usually means things are too wet and still. Buds that feel crispy within three or four days are drying too fast.
How to Cure: The Jar Method
Curing is mostly patience.
- Remove the buds from the stems and place them loosely in airtight glass jars, filling each jar about three-quarters full so there’s air at the top.
- Store the jars somewhere cool and dark. Oregon State’s guidance for curing hemp flower is around 18°C and 60% humidity for 14 days.
- “Burp” the jars. Open them for a few minutes once or twice a day for the first week to let moisture escape, then every few days after that. If the buds feel damp again after a day in the jar, take them out and let them air-dry for a few hours before re-sealing.
- Use a small hygrometer (a humidity meter) inside one jar if you can. A reading that settles around 58 to 62% means the buds are where you want them. Readings above about 65% mean they need more air.
- Wait at least two weeks. Many growers cure for a month or longer, and the flavor usually keeps improving for a while.
There’s a reason that 65% matters. Regulators use a measurement called water activity, which describes how available the water in a product is to microbes. California, Oregon, Minnesota and Utah, among others, fail lab-tested flower if its water activity is above 0.65, because above that level mold becomes a real risk. Your jar hygrometer reading is a rough stand-in for the same idea: keep it in the high 50s to low 60s.
Storing Your Harvest
Once cured, flower keeps best in airtight containers in a cool, dark place. Oregon State suggests long-term storage at about 18°C and 45 to 55% humidity. Avoid the fridge door, sunny shelves and plastic bags that crush the buds. The 1976 storage study found carefully prepared cannabis stayed reasonably stable for one to two years when kept in the dark at room temperature.
How We Solved It for Sunday
The hard part of drying at home is finding the right space. A closet is often too warm and stuffy. A spare room is too bright or too dry. And for a week or two, your home smells like harvest day.
We built a post-harvest drying mode into Sunday so the box you grew in can also give your buds a controlled drying process, instead of you improvising in a closet. You still do the satisfying part, cutting the plant down and hanging the branches, and curing in jars is still up to you. But you don’t have to build a separate drying setup to get there.
Everything that goes before matters too. Buds that went through flowering at the right humidity, with good airflow and without pesticides, start drying in better shape. We explain how Sunday manages that in Heat, Humidity and Smell.
The Takeaway
Drying and curing don’t need fancy equipment. They need patience and the right conditions: dark, cool, moderately humid, with gentle air movement. Dry for about one to two weeks until the small stems snap, cure in jars for at least two more, and keep checking for dampness. Rush it and you lose the flavor you spent months growing. Take your time and the jar will thank you.
Let Sunday do the growing
Sunday automates light, climate, watering and feeding, the way the pros do it. Join the waitlist to be first in line when pre-orders reopen.